
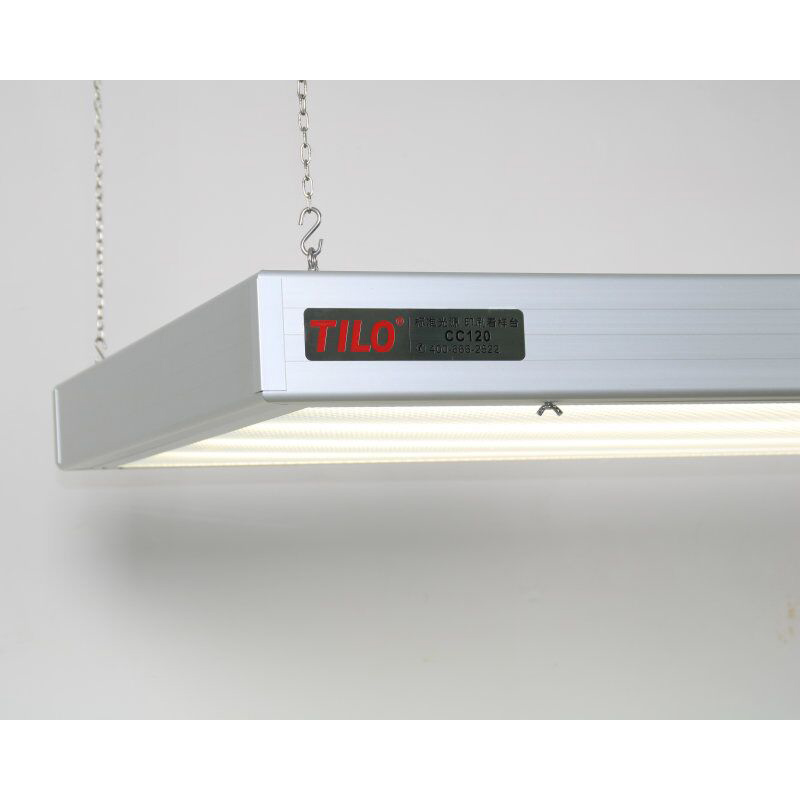
Brand: TILO
Made in China
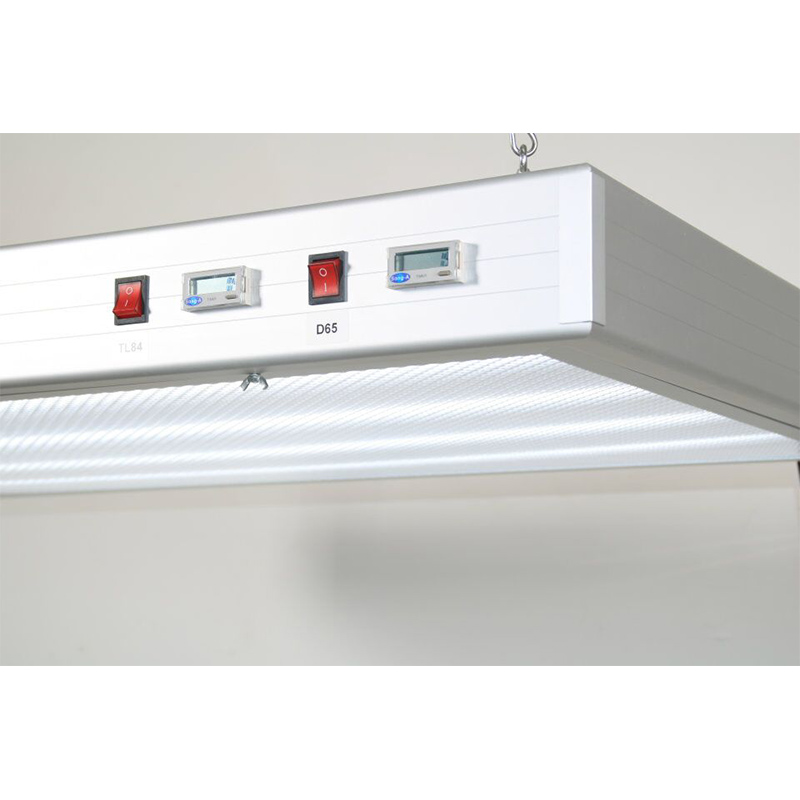
Configuration: D65, D50, TL84
Weight: 72KG
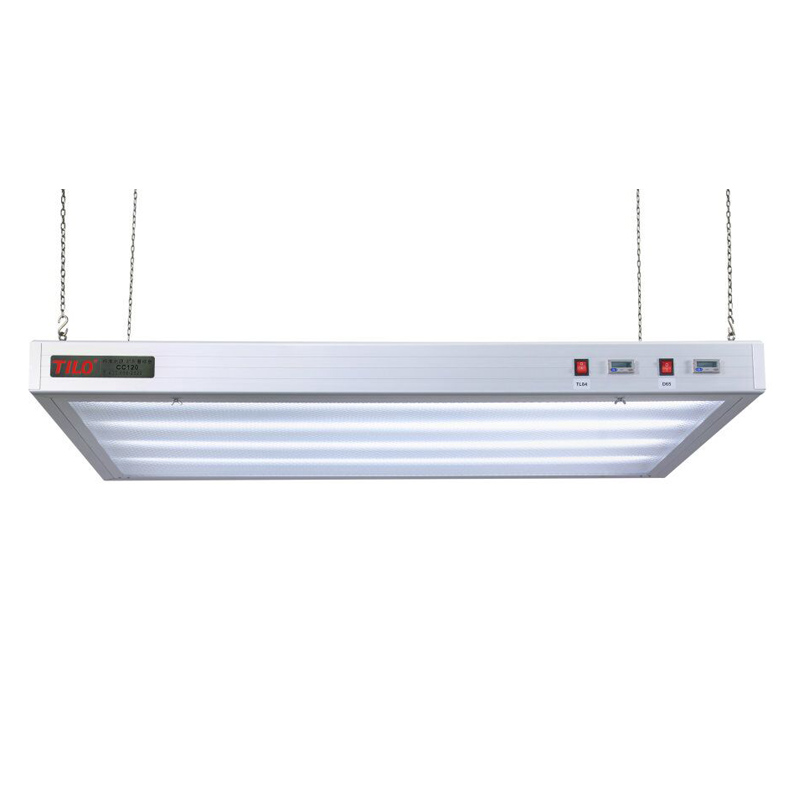
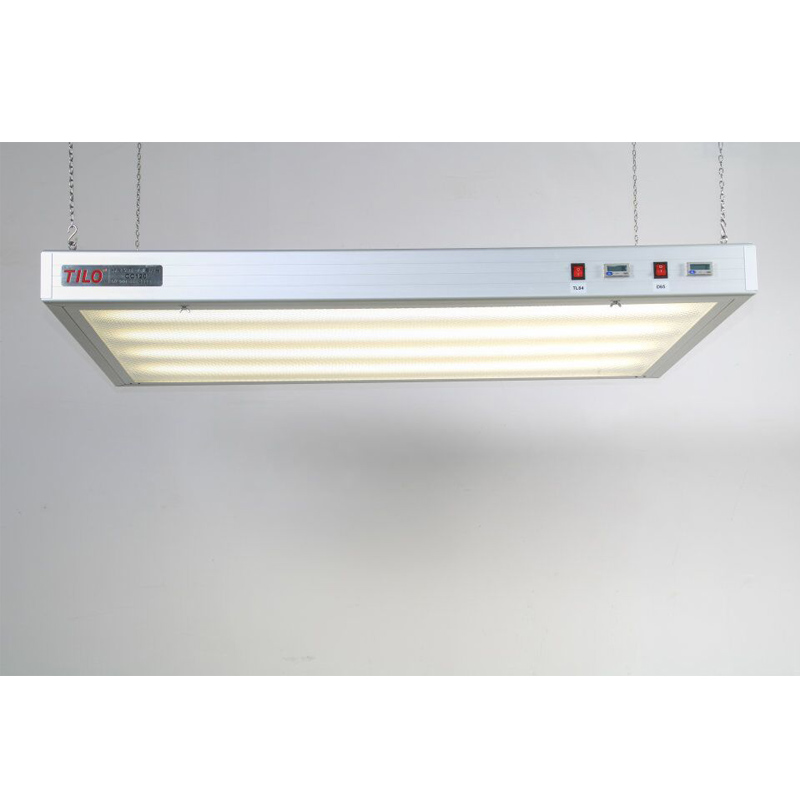
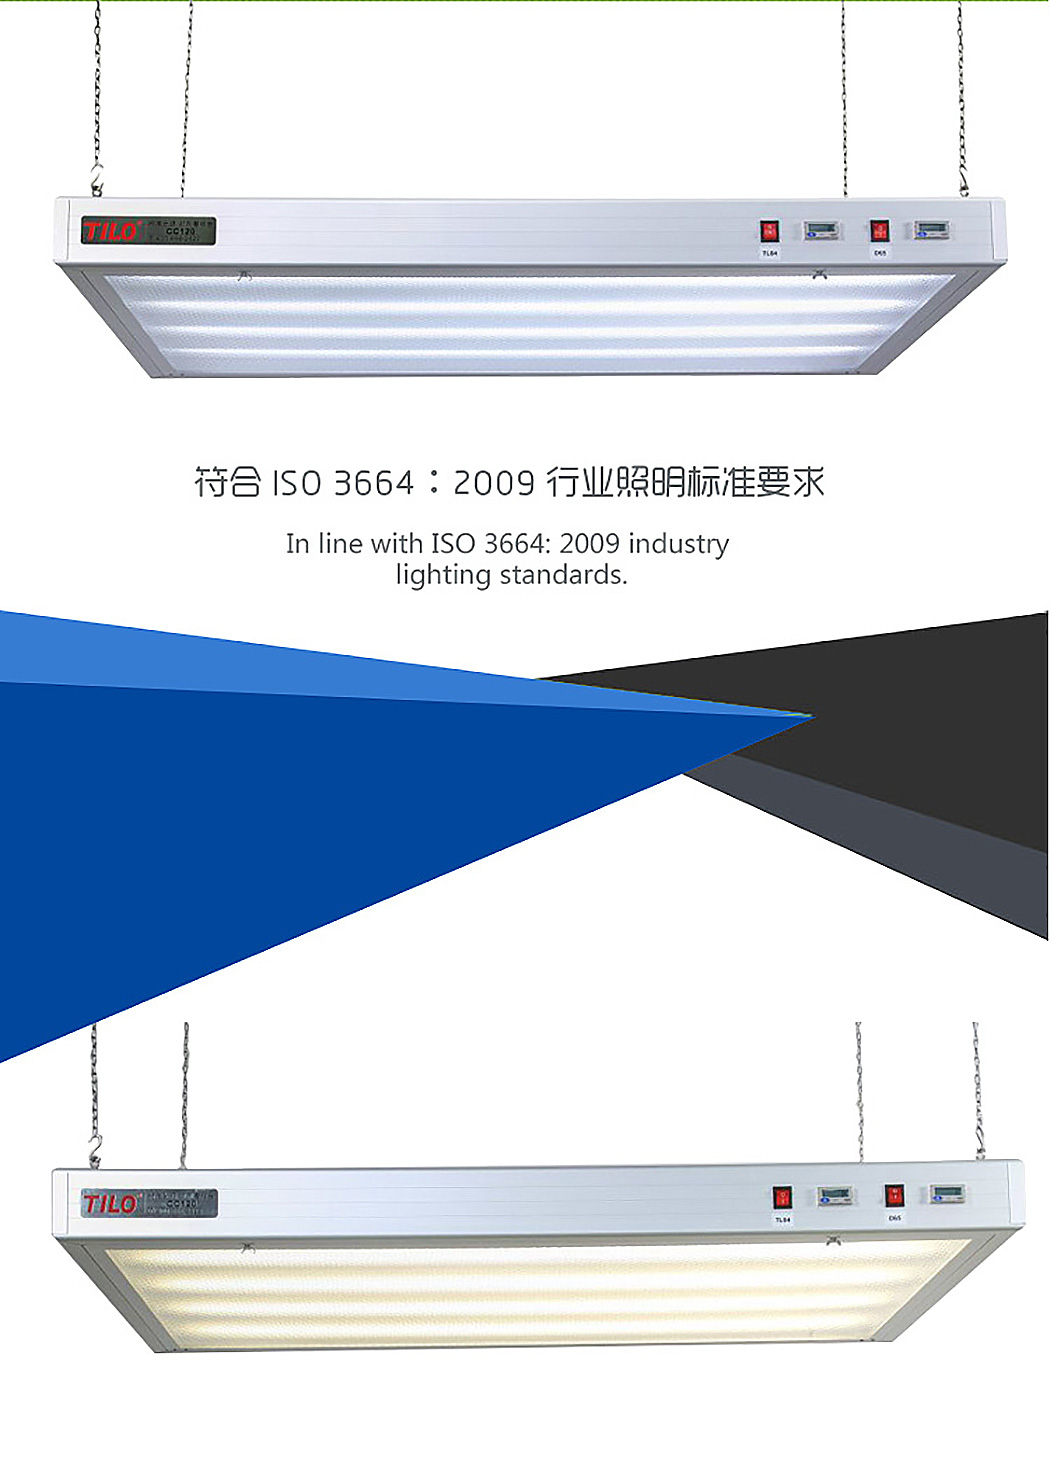
CC120-W Hanging Color Viewer light booth is widely applied to printing industry, furnishings and color matching of the printing ink industry etc.. It is a necessity for those industry to control the colors and qualities of products.
CC120-W hanging light booth supports 3 versions, single light source, double light source, and 3 light sources. Standard light source is D65, D50, U30, and we offer TL84, UV, CWF ,TL83 for optional. This machine is controlled by microcomputer, which allows the rapid conversion between each light source. The Color Viewer also has the function of display the running time of each light source.
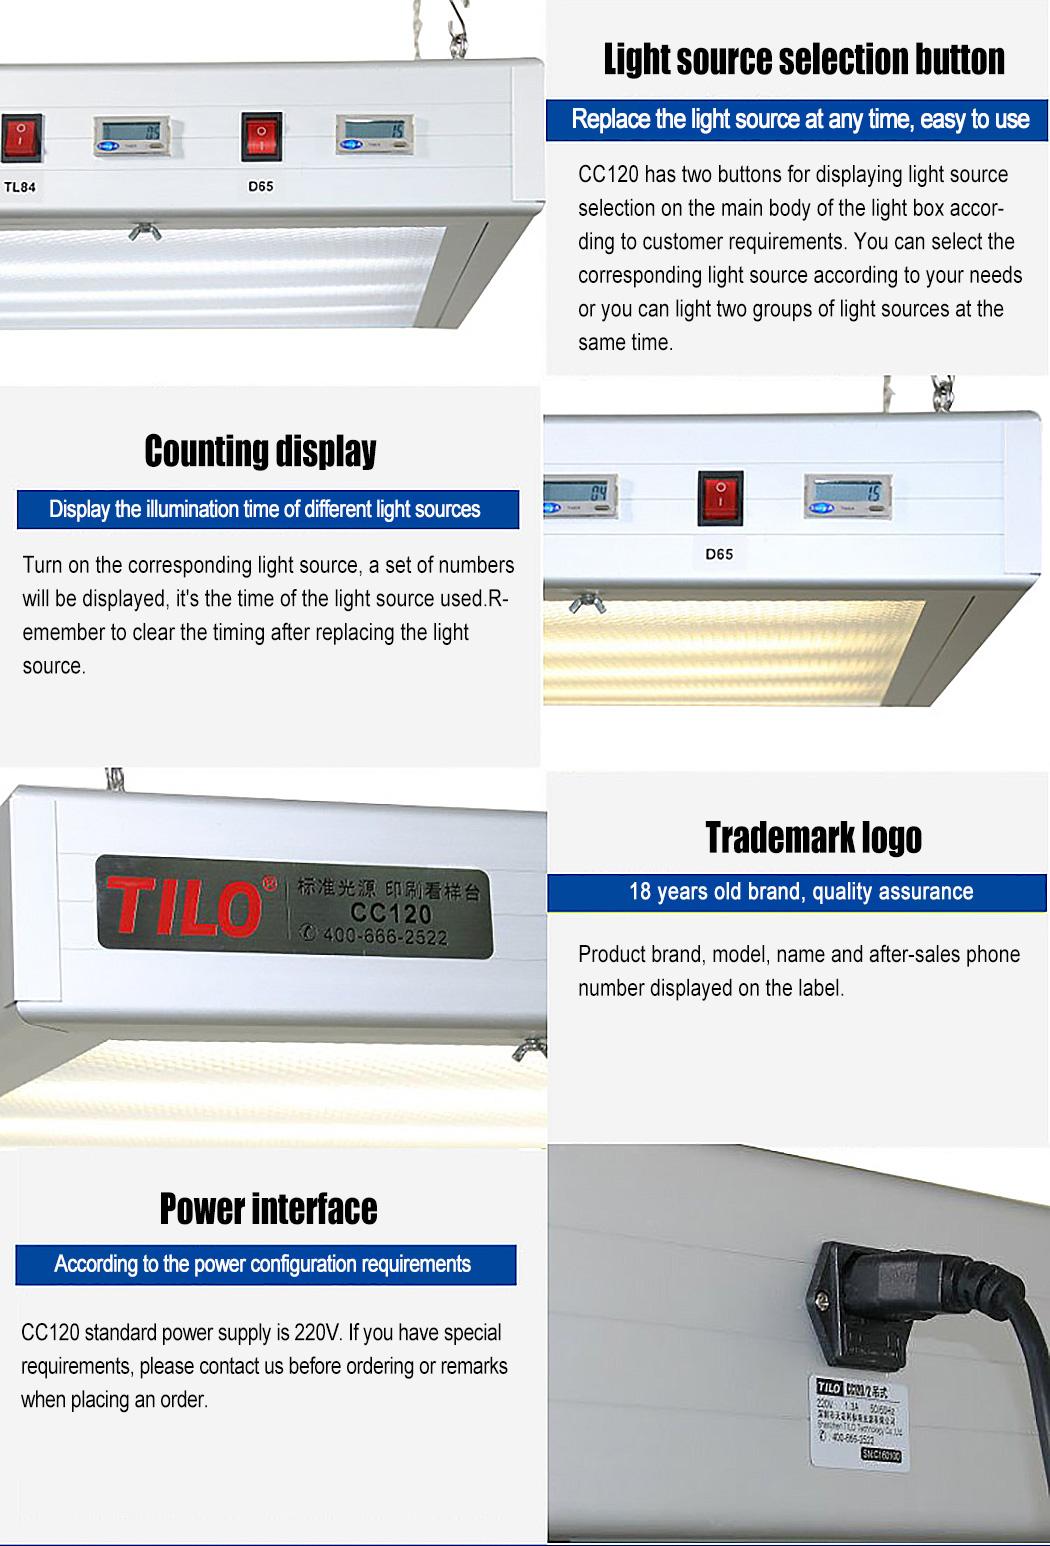
1. Insert the power cord and the docking station into the power socket of the color viewer.The power socket at the top of the color viewer, and the other end is connected to the mains power supply (note that the mains power supply must match the input power indicated by the color viewer).
2. Select a light source switch to press, the corresponding light source lamp lights up, and the timer of the color viewer starts to count. o switch the light source, you can turn off the front light source and then press the light switch that needs to be lit. To turn on two or more light sources at the same time, simply press two or more light source switches at the same time.
3. Place the item to be inspected in the middle of the table. When comparing the color of two or more items, place them side by side on the table top and compare them as far as possible in the middle position. When working, the table top should not be placed with anything unrelated to work, so as not to affect the color change.
4. After the test is completed, turn off all the light source lamp switches that have been turned on. Turn off the power when not in use after work, and unplug the power cord when not in use for a long time.
5. Replace the new lamp tube. There are two white cap screws on the front of the light-transmissive glass. You can unscrew the two screws and gently open the light-transmissive glass and lower it. Remove the lamp that needs to be replaced and install the new lamp. Pay attention to different light sources, different positions of the lamp, don't make mistakes.
1. Use of standard light source: After the light source lamp is illuminated for 30 minutes, the color temperature, color rendering index and illuminance reach the best state; if there is no special reason, frequent switching should be avoided to prolong the life of the lamp.
2. Light source lamp life: After using 2000-3000 hours,the color temperature, color rendering index and illuminance of the standard light source lamp will be attenuated. It is recommended to replace it in time to avoid affecting the color effect.
3, cleaning and maintenance: Please unplug the power plug before cleaning and maintenance, cut off the power, please use a regular cleaning agent to wipe the device with a clean soft cloth, avoid washing directly with water.
| Turn on the switch,but lamps are not bright |
1 The power cord is intact and plugged into the outlet; 2 The lamp holder position may be loose,tighten it; 3 If the lamp is damaged or burned out,replace it; |
| The surface of the board is reflective and dim | Clean with a clean, soft cloth; |
| Light source timer does not count | Press the reset button to restart. |
1. The light source products are guaranteed for one year.If there is any product quality problem within one year,our company will be responsible for repair or replacement;
2. All of our products have standardized packaging. If the user finds the package or the product inside is damaged, please contact us immediately, so that we can handle it for you;
3. Replace professional standard light source lamp after it's damaged;
If you have problems with installation or use, please contact our technical engineers directly.
Special artificial daylight source for printing
1.D50 standard light source lamp Simulate Daylight Warm daylight
◆High color rendering index CRI≥95 or CRI=98
◆According to ISO 3664:2009 printing standard observation conditions
◆Graphica Pro, COLOR proof series for the exclusive use of imported printing machine
60cm 18W/950 T8 Graphica Pro imported from Europe
120cm 36W/950 T8 Graphica Pro imported from Europe
2.D65 standard light source lamp Simulate Daylight Cold daylight
◆High color rendering index CRI≥95 or CRI=98
◆According to ISO 3664:2009 printing standard observation conditions
◆Special light source for color viewer and color light box,T60+ P60+ CC120 series
60cm 18W/965 T8 Graphica Pro imported from Europe
120cm 36W/965 T8 Graphica Pro imported from Europe
CWF light source lamp (4150K, cool white fluorescent, US store light source)
TL84 light source lamp (4000K, European and Japanese store lighting source)
U30 light source lamp (3000K, American store lighting source)
U35 light source lamp (3500K, designated light source of United States Target Department)
Light source tube (UV source for the detection of products using fluorescent and whitening dyes)
A light source bulb (2856K,American shopwindow spotlight/home incandescent light,color reference light source)
| Boundary dimension | 130 cm x 76 cm x 10 cm (length) x (width) x (height) |
| Material | Real aluminium alloy material |
|
fr |
Aluminum alloy profile streamlined design beautiful and elegant imported reflector Uniform light coverplate and illumination |
| Uniform light coverplate | Openable uniform light coverplate for easy lamp replacement |
| Hanging material | Hooks at the back and a load-bearing steel chain that can be hung directly to the ceiling or fixed to the rack |
| Light Source | Conforms to ISO3664 international standard |
| Color temperature | D50 (5000K) or D65 (6500K) |
| Lamp series | Graphica for the exclusive use of imported printing machine |
| Color rendering index | D50: CRI ≧ 95 or CRI = 98 D65: CRI ≧ 90 or CRI = 95 |
| Number of lamps | 36Wx4 (pcs) - with light source timer |
1. When I received NH310/NH300 colorimeter and perform measurement, why the measured data is abnormal?
After receiving NH310/NH300, you have to perform white and black calibration manually when first starting.
2. In which condition, manual white and black calibration and auto calibration are required for NH310?
a. It’s needed to perform manual calibration for NH310 when first starting.
b. In the subsequent starting, NH310 will perform auto calibration at startup. No need to perform manual calibration.
c. Suggestion: it’s best to perform manual calibration once a week or when NH310 measured data is not accurate.
3. In which condition, manual white and black calibration for NH300 is required?
a. It’s needed to perform manual calibration for NH300 when first starting.
b. In the subsequent starting, no need to perform manual calibration.
c. Suggestion: it’s best to perform manual calibration once a week or when NH300 measured data is not accurate.
4. How to replace NH310 measuring aperture?
There are three measuring apertures for NH310: Φ8mm (standard accessory), Φ4mm (standard accessory), extended Φ8mm (optional accessory)
a. Turning on
b. Removing measuring aperture, install the needed measuring aperture.
c. Select “Settings-Aperture Setting” in main menu to select corresponding measuring aperture.
d. After selecting aperture, the instrument will display “White and Black Calibration” interface. White and black calibration must be performed.
e. Replace completed.
5. CQCS3 (Color Quality Control System) Installation
a. Before installation, please Copy CQCS3 folder to your computer and don’t remove any files in CQCS3 folder.
b. Double-click the setup.exe to install CQCS3 software.
c. Then double-click Install.bat under the CQCS3\USB_Driver file to install the driver.
d. Detailed installation information please read the "Installing Software" under CQCS3 User manual.doc.
6. How to check communication port?
a. Connect colorimeter to the PC with USB cable.
b. Turn on the colorimeter to enter main menu. Select “Comm” and press “Enter” key to start communication.
c. Right click on “My Computer” on the desktop. Click “Manage” -> “Device Manager” -> “Ports”, you can see similar display as “SCI USB2Serial (COM6)”.
d. Click “Settings->Communication Parameters” in CQCS3 software interface. Select the corresponding port in “Serial Port”.
7. After completing CQCS3 installation, how to solve the problem if it display “! USB Device” or “! SCI USB2Serial (COM6)” when checking the communication port?
a. Right click “! USB Device” or “! SCI USB2Serial (COM6)”, “Update Driver” -> “Install from a list or specific location (Advanced)” -> “Next” ->“Include this location in the search” -> “Browse”, specify USB driver file path “CQCS3\USB_Driver”, click “Next”. Then it will install successfully.
b.Detailed installation information please refers to “2.2 Installing USB Driver” in Color Quality Management System User Manual.doc.
8. Notes for First Using CQCS3 Software
a. Users must specify Standard File Name, Sample File Name and Sample Database File Name when first use.
b.Standard File is use to store standard measurement data. Sample File is used to store sample measurement data. Sample Database File is used to store the measured data exported from sample records.
9. How to solve the problem when “Connection Timeout” occurred?
a. When the colorimeter is disconnected to the PC, “Connection Timeout” will occur. At the moment, you have to check whether the USB cable is well connected the colorimeter and the PC. Then you can re-plug the USB to try out.
b. After ensuring the colorimeter is connected to the PC with USB cable, turn on the colorimeter and enter the main menu. Select “Comm” and press “Enter” key to start communication.
c. Turn off CQCS3 software, and reopen it.
10. How to solve the problem when the interface display "USB Disconnect"
a. Check whether the USB cable is connected. If not, please connect it. Check whether the connection is effective. You can re-plug the USB cable to test.
b. If the USB cable is connected well but the interface still displays "USB Disconnect", please re-start the colorimeter and enter "Menu" -"Comm"to start the communication.
c. Change the USB cable or change the USB port in you PC.
11. How to solve the problem when the colorimeter cannot be turned on in the condition of battery-powered?
a. If this phenomenon occurred, it means the battery power is not enough. You need to charge the battery.
b. When charge the battery, please insert the battery to the instrument, and plug in the adapter to charge the battery. After 5 minutes, the instrument can be turned on.
c. If the instrument still cannot be turned on after charging 5 minutes, you can pull out the adapter and re-plug in to check it. Or repeat this operation.
d. If the instrument still cannot be turned on after charging 5 minutes, you can turn off the colorimeter and turn on it again to check it. Or repeat this operation.
e. If you have tried all the methods above but the colorimeter still cannot be turned on, please change the battery.
