
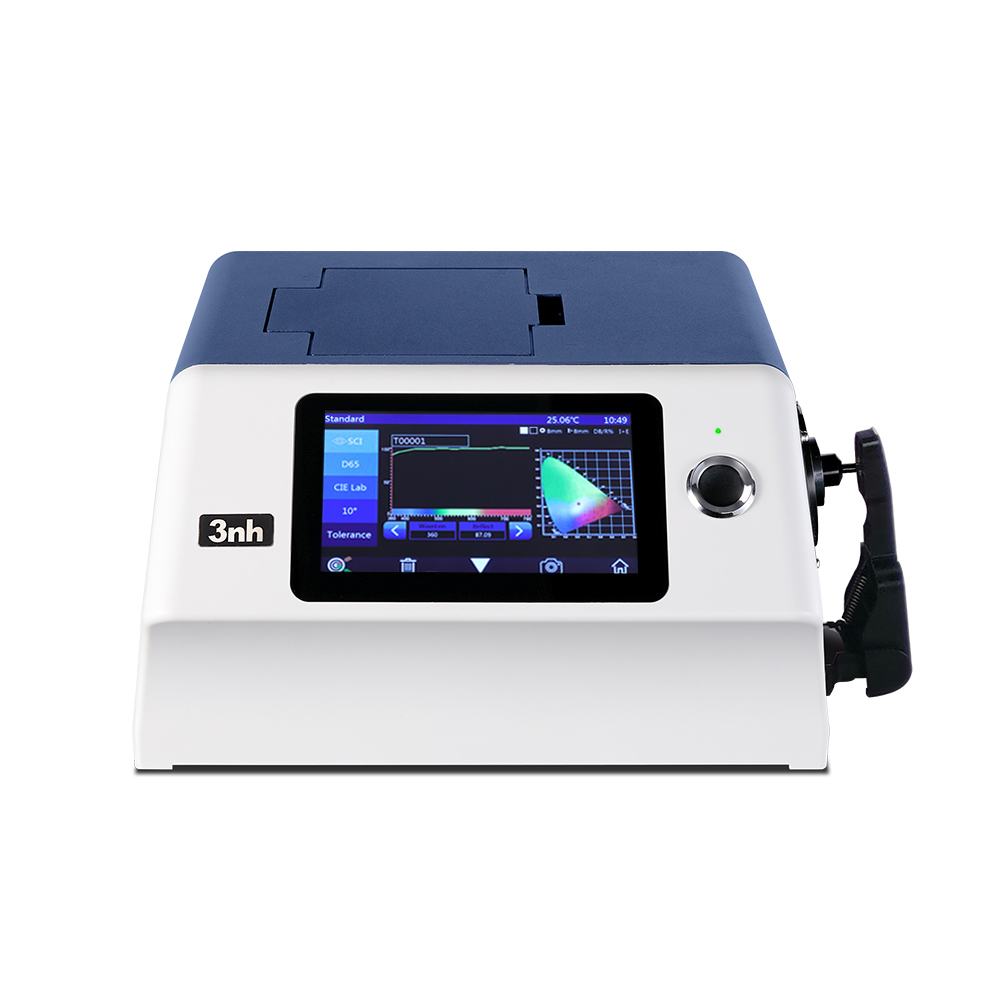
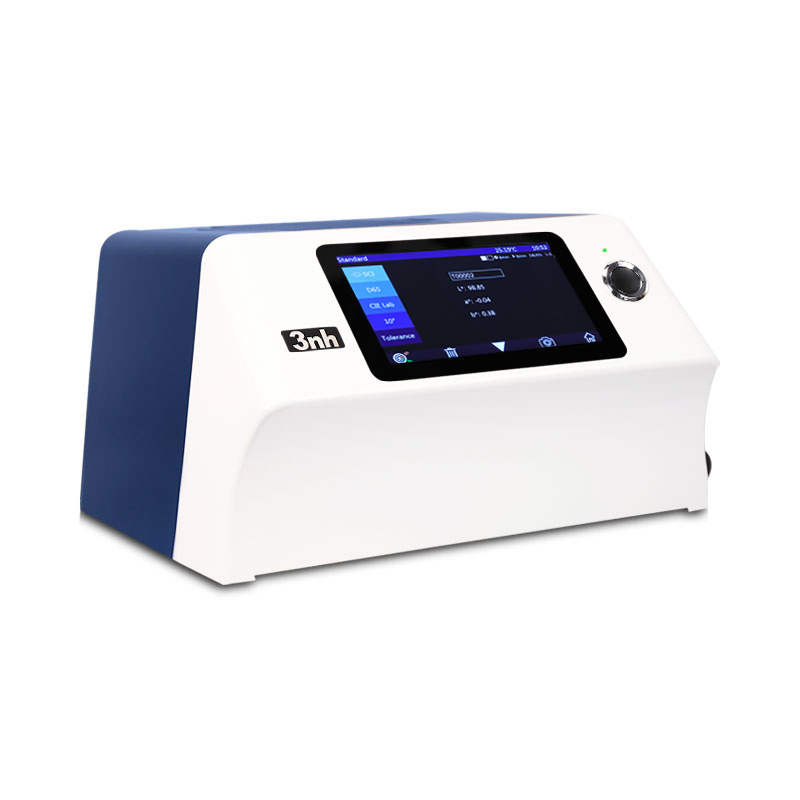
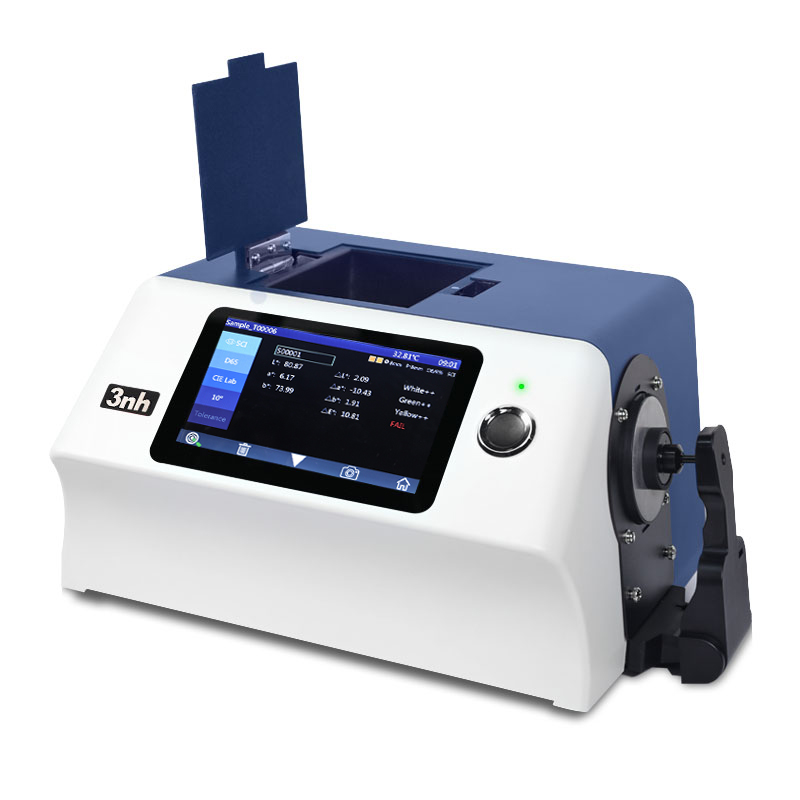
The benchtop spectrophotometer TS8296 is a spectrophotometer developed
by 3nh using its own core technology of spectroscopy. It uses dual-array
CMOS image sensors with higher sensitivity and wider spectral response
range, making the test more accurate. The repeatability ΔE*ab of the TS8296
benchtop spectrophotometer is easily controlled within 0.01, and the inter-instrument
agreement ΔE*ab is controlled within 0.12. The data is stable and reliable,
and can be used for accurate color analysis and transmission in the laboratory.
Application of TS8296 Benchtop Spectrophotometer
The TS8296 benchtop spectrophotometer is equipped with four measuring apertures of 25.4mm, 15mm, 8mm, and 4mm, which is suitable for more samples to be tested and meets the requirements of reflective samples and transparent samples in plastic electronics, paint and ink, textile and garment printing and dyeing, printing and other industries; it can be used for fluorescent sample measurement.
Features of TS8296 Benchtop Spectrophotometer
1. It adopts the internationally-used D/8 structure, compatible with SCI/SCE measurement, and supports SCI+SCE rapid measurement at the same time
The TS8296 benchtop spectrophotometer adopts the internationally applicable D/8 illumination observation conditions, SCI/SCE (including specular reflection/not including specular reflection) synthesis technology, and supports SCI+SCE simultaneous rapid measurement.

2. Dual array CMOS image sensor
With high sensitivity and wide spectral response range, it ensures the measurement speed, accuracy, stability and consistency of the instrument.

3. Multiple color measurement spaces, multiple observation light sources
TS8296 benchtop spectrophotometer provides CIE LAB, XYZ, Yxy, LCh, CIE LUV, Musell, s-RGB, HunterLab, βxy, DIN Lab99 color space, as well as D65, A, C, D50, D55, D75, F1, F2 , F3, F4, F5, F6, F7, F8, F9, F10, F11, F12, CWF, DLF, TL83, TL84, TPL5, U30 multiple observation light sources, which can meet the special measurement requirements under different measurement conditions.

4. Adopt a combined full-spectrum LED light source and UV light source
The full-band balanced LED light source ensures sufficient spectral distribution in the visible light range, avoids the lack of spectrum of white light LEDs in specific wavelength bands, and ensures the measurement speed of the instrument and the accuracy of the measurement results. Professional UV light sources ensure UV testing more reliable.

5. Metrological verification report
Each TS8296 benchtop spectrophotometer has been verified and tested, and the instrument is verified according to the measurement standards of the authoritative verification department at the factory, and the measurement data is traced to the National Institute of Metrology to ensure the authority of the instrument test data.
6. Automatic aperture recognition
The TS8296 benchtop spectrophotometer is equipped with four measuring apertures of Φ25.4/15/8/4mm, which can be switched at will to meet the special needs of customers.

7. Industrial-grade high-definition touch screen, easy-to-use user interface
Using a 7-inch industrial-grade high-definition touch screen, the control is smooth, and the easy-to-use user interface makes the operation comfortable, convenient and easier to use.

8. Color management software
The SQCX quality management software matched with the TS8296 benchtop spectrophotometer is suitable for quality monitoring and color data management in various industries. Data the user's color management, compare color differences, generate test reports, provide a variety of color space measurement data, and customize customer color management.

Technical Parameters of TS8296 Benchtop Spectrophotometer
| Model | TS8296 |
| Optical Geometry |
Reflect: di:8°, de:8°((diffuse illumination, 8°direction reception) ; SCI (specular component included)/SCE (specular component excluded) ;Include UV/exclud UV Transmittance: di:0°, de:0° (diffuse illumination: 0°direction reception) ; SCI (specular component included)/SCE (specular component excluded) ; Include UV/exclud UV Haze(ASTM D1003), Conforms to CIE No.15,GB/T 3978,GB 2893,GB/T 18833,ISO7724/1,ASTM E1164,DIN5033 Teil7 |
| Application |
It is used for accurate analysis and transmission of laboratory color. Used for color transfer and quality control of reflective samples and transparent samples in plastic electronics, paint and ink, textile and garment printing and dyeing, printing and other industries. |
| Integrating Sphere Size | Φ154mm |
| Light Source | 360 nm to 780 nm, Combined LED Light, 400nm cut-off light source,420nm cut-off light source |
| Spectrophotometric Mode | Concave Grating |
| Sensor | 256 Image Element Double Array CMOS Image Sensor |
| Wavelength Range | 360-780nm |
| Wavelength Interval | 10nm |
| Semiband Width | 10nm |
| Measured Reflectance Range | 0-200% |
| Measuring Aperture |
Reflective : Φ30mm/Φ25.4mm, Φ18mm/Φ15mm, Φ10mm/Φ8mm, Φ6mm/Φ4mm; Transmissive : Φ25.4mm, Φ4mm Remark: 1. Automatic identification of switch aperture 2.Customers can configure the aperture and lens position according to their needs |
| Specular Component | Reflectance: SCI/SCE, Transmittance: SCI&SCE |
| Color Space | CIE LAB,XYZ,Yxy,LCh,CIE LUV,Musell,s-RGB,HunterLab,βxy,DIN Lab99 |
| Color Difference Formula | ΔE*ab,ΔE*uv,ΔE*94,ΔE*cmc(2:1),ΔE*cmc(1:1),ΔE*00, DINΔE99,ΔE(Hunter) |
| Other Colorimetric Index |
WI (ASTM E313, CIE/ISO, AATCC, Hunter), YI (ASTM D1925, ASTM 313), Metamerism index Mt, Staining Fastness, Color Fastness, Color Strength, Opacity, APHA/Hazen/Pt-Co (Platinum Cobalt Index), Gardner Index 8° gloss, 555 color classification, haze (ASTM D1003), Saybolt (Sybert index), ASTM D1500 color scale, Chinese Pharmacopoeia color scale |
| Observer Angle | 2°/10° |
| Illuminant | D65,A,C,D50,D55,D75,F1,F2,F3,F4,F5,F6,F7,F8,F9,F10,F11,F12,CWF,DLF,TL83,TL84,TPL5,U30 |
| Displayed Data | Spectrogram/Values, Samples Chromaticity Values, Color Difference Values/Graph, PASS/FAIL Result, Color Offset |
| Measuring Time | About 2.4s (Measure SCI & SCE about 5s) |
| Repeatability |
Spectral reflectance: Φ25.4mm/SCI, Standard deviation within 0.04% Chromaticity value:Φ25.4mm/SCI, Standard deviation within ΔE*ab 0.01 (After the instrument is warmed up and calibrated, measure the average value of the whiteboard 30 times at an interval of 5s) Spectral transmittance: Φ25.4mm/SCI, Standard deviation within 0.05% Chromaticity value:Φ25.4mm/SCI, Standard deviation within ΔE*ab 0.02(After the instrument is warmed up and calibrated, measure the average value of the whiteboard 30 times at an interval of 5s) |
| Inter-instrument Error | Φ25.4mm/SCI, Within ΔE*ab 0.12(Measured average value of 12 tiles of BCRA series Ⅱ) |
| Dimension | L*W*H=370x300x200mm |
| Weight | Approx. 9.6kg |
| Power | AC 24V, 3A Power adapter power supply |
| Illuminant Life Span | 5 years, more than 3 million times measurements |
| Display | 7-inch TFT color LCD, Capacitive Touch Screen |
| Data Port | USB, Bluetooth®5.0, print serial port |
| Data Storage | Standard 5000 Pcs, Sample 40000 Pcs(SCI/SCE counts as one piece of data) |
| Language | Simplified Chinese, Traditional Chinese, English, (German, French, Spanish can be customized) |
| Operating Environment | 0~40℃(32~104°F) |
| Storage Environment | -20~50℃(-4~122°F) |
| Standard Accessory | Power adapter, manual, quality management software (download from official website), data cable, standard calibration board, black calibration box, transmission black baffle, sample holder, 25.4mm aperture, 15mm aperture, 8mm aperture, 4mm aperture, transmission test fixture assembly , Micro-hole (4mm) transmission test fixture assembly |
| Optional Accessory | Mini printer, instrument upside down test fixture, petri dish |
| Notes | The specifications are subject to change without notice. |
1. When I received NH310/NH300 colorimeter and perform measurement, why the measured data is abnormal?
After receiving NH310/NH300, you have to perform white and black calibration manually when first starting.
2. In which condition, manual white and black calibration and auto calibration are required for NH310?
a. It’s needed to perform manual calibration for NH310 when first starting.
b. In the subsequent starting, NH310 will perform auto calibration at startup. No need to perform manual calibration.
c. Suggestion: it’s best to perform manual calibration once a week or when NH310 measured data is not accurate.
3. In which condition, manual white and black calibration for NH300 is required?
a. It’s needed to perform manual calibration for NH300 when first starting.
b. In the subsequent starting, no need to perform manual calibration.
c. Suggestion: it’s best to perform manual calibration once a week or when NH300 measured data is not accurate.
4. How to replace NH310 measuring aperture?
There are three measuring apertures for NH310: Φ8mm (standard accessory), Φ4mm (standard accessory), extended Φ8mm (optional accessory)
a. Turning on
b. Removing measuring aperture, install the needed measuring aperture.
c. Select “Settings-Aperture Setting” in main menu to select corresponding measuring aperture.
d. After selecting aperture, the instrument will display “White and Black Calibration” interface. White and black calibration must be performed.
e. Replace completed.
5. CQCS3 (Color Quality Control System) Installation
a. Before installation, please Copy CQCS3 folder to your computer and don’t remove any files in CQCS3 folder.
b. Double-click the setup.exe to install CQCS3 software.
c. Then double-click Install.bat under the CQCS3\USB_Driver file to install the driver.
d. Detailed installation information please read the "Installing Software" under CQCS3 User manual.doc.
6. How to check communication port?
a. Connect colorimeter to the PC with USB cable.
b. Turn on the colorimeter to enter main menu. Select “Comm” and press “Enter” key to start communication.
c. Right click on “My Computer” on the desktop. Click “Manage” -> “Device Manager” -> “Ports”, you can see similar display as “SCI USB2Serial (COM6)”.
d. Click “Settings->Communication Parameters” in CQCS3 software interface. Select the corresponding port in “Serial Port”.
7. After completing CQCS3 installation, how to solve the problem if it display “! USB Device” or “! SCI USB2Serial (COM6)” when checking the communication port?
a. Right click “! USB Device” or “! SCI USB2Serial (COM6)”, “Update Driver” -> “Install from a list or specific location (Advanced)” -> “Next” ->“Include this location in the search” -> “Browse”, specify USB driver file path “CQCS3\USB_Driver”, click “Next”. Then it will install successfully.
b.Detailed installation information please refers to “2.2 Installing USB Driver” in Color Quality Management System User Manual.doc.
8. Notes for First Using CQCS3 Software
a. Users must specify Standard File Name, Sample File Name and Sample Database File Name when first use.
b.Standard File is use to store standard measurement data. Sample File is used to store sample measurement data. Sample Database File is used to store the measured data exported from sample records.
9. How to solve the problem when “Connection Timeout” occurred?
a. When the colorimeter is disconnected to the PC, “Connection Timeout” will occur. At the moment, you have to check whether the USB cable is well connected the colorimeter and the PC. Then you can re-plug the USB to try out.
b. After ensuring the colorimeter is connected to the PC with USB cable, turn on the colorimeter and enter the main menu. Select “Comm” and press “Enter” key to start communication.
c. Turn off CQCS3 software, and reopen it.
10. How to solve the problem when the interface display "USB Disconnect"
a. Check whether the USB cable is connected. If not, please connect it. Check whether the connection is effective. You can re-plug the USB cable to test.
b. If the USB cable is connected well but the interface still displays "USB Disconnect", please re-start the colorimeter and enter "Menu" -"Comm"to start the communication.
c. Change the USB cable or change the USB port in you PC.
11. How to solve the problem when the colorimeter cannot be turned on in the condition of battery-powered?
a. If this phenomenon occurred, it means the battery power is not enough. You need to charge the battery.
b. When charge the battery, please insert the battery to the instrument, and plug in the adapter to charge the battery. After 5 minutes, the instrument can be turned on.
c. If the instrument still cannot be turned on after charging 5 minutes, you can pull out the adapter and re-plug in to check it. Or repeat this operation.
d. If the instrument still cannot be turned on after charging 5 minutes, you can turn off the colorimeter and turn on it again to check it. Or repeat this operation.
e. If you have tried all the methods above but the colorimeter still cannot be turned on, please change the battery.
